A Complete Guide to the Handin Server (Staff)
1 Logging in
Go to https://handins.ccs.neu.edu/ on your web browser. Please note that you cannot use Microsoft Edge or Safari as they are not currently compatible with the handin server. You should see this page:

Log in using your CCIS credentials. The first time you log in you should see this page:

Please provide your first name, your preferred name, your Last name, an email address, your NUID#, and a profile picture. It is very important to provide a recognizable profile picture so we know who you are. Please note that if your profile photo looks odd it is because it has been resized. To fix this please upload a smaller file (less than 200px wide by 300px tall, and less than 50KB in file-size). Click the
 button in the lower right corner of the screen when you are finished. This will take you to the list of courses.
2 The homepage
To go to the homepage click the dolphin at the top of the screen (available from any page):

The homepage looks something like the image below. Notice that it gives you a list of the courses you are registered for in each semester as well as the list of assignments for those courses and how you did on them. On the right hand side you will see a “Teams” box which will give you information about any students you are currently partnered with. Right now I have no team so it says “No active teams”.

3 Registering for a course
Go to the Courses page listed in the toolbar. I have starred the link in the image below which also shows what the Courses page looks like.
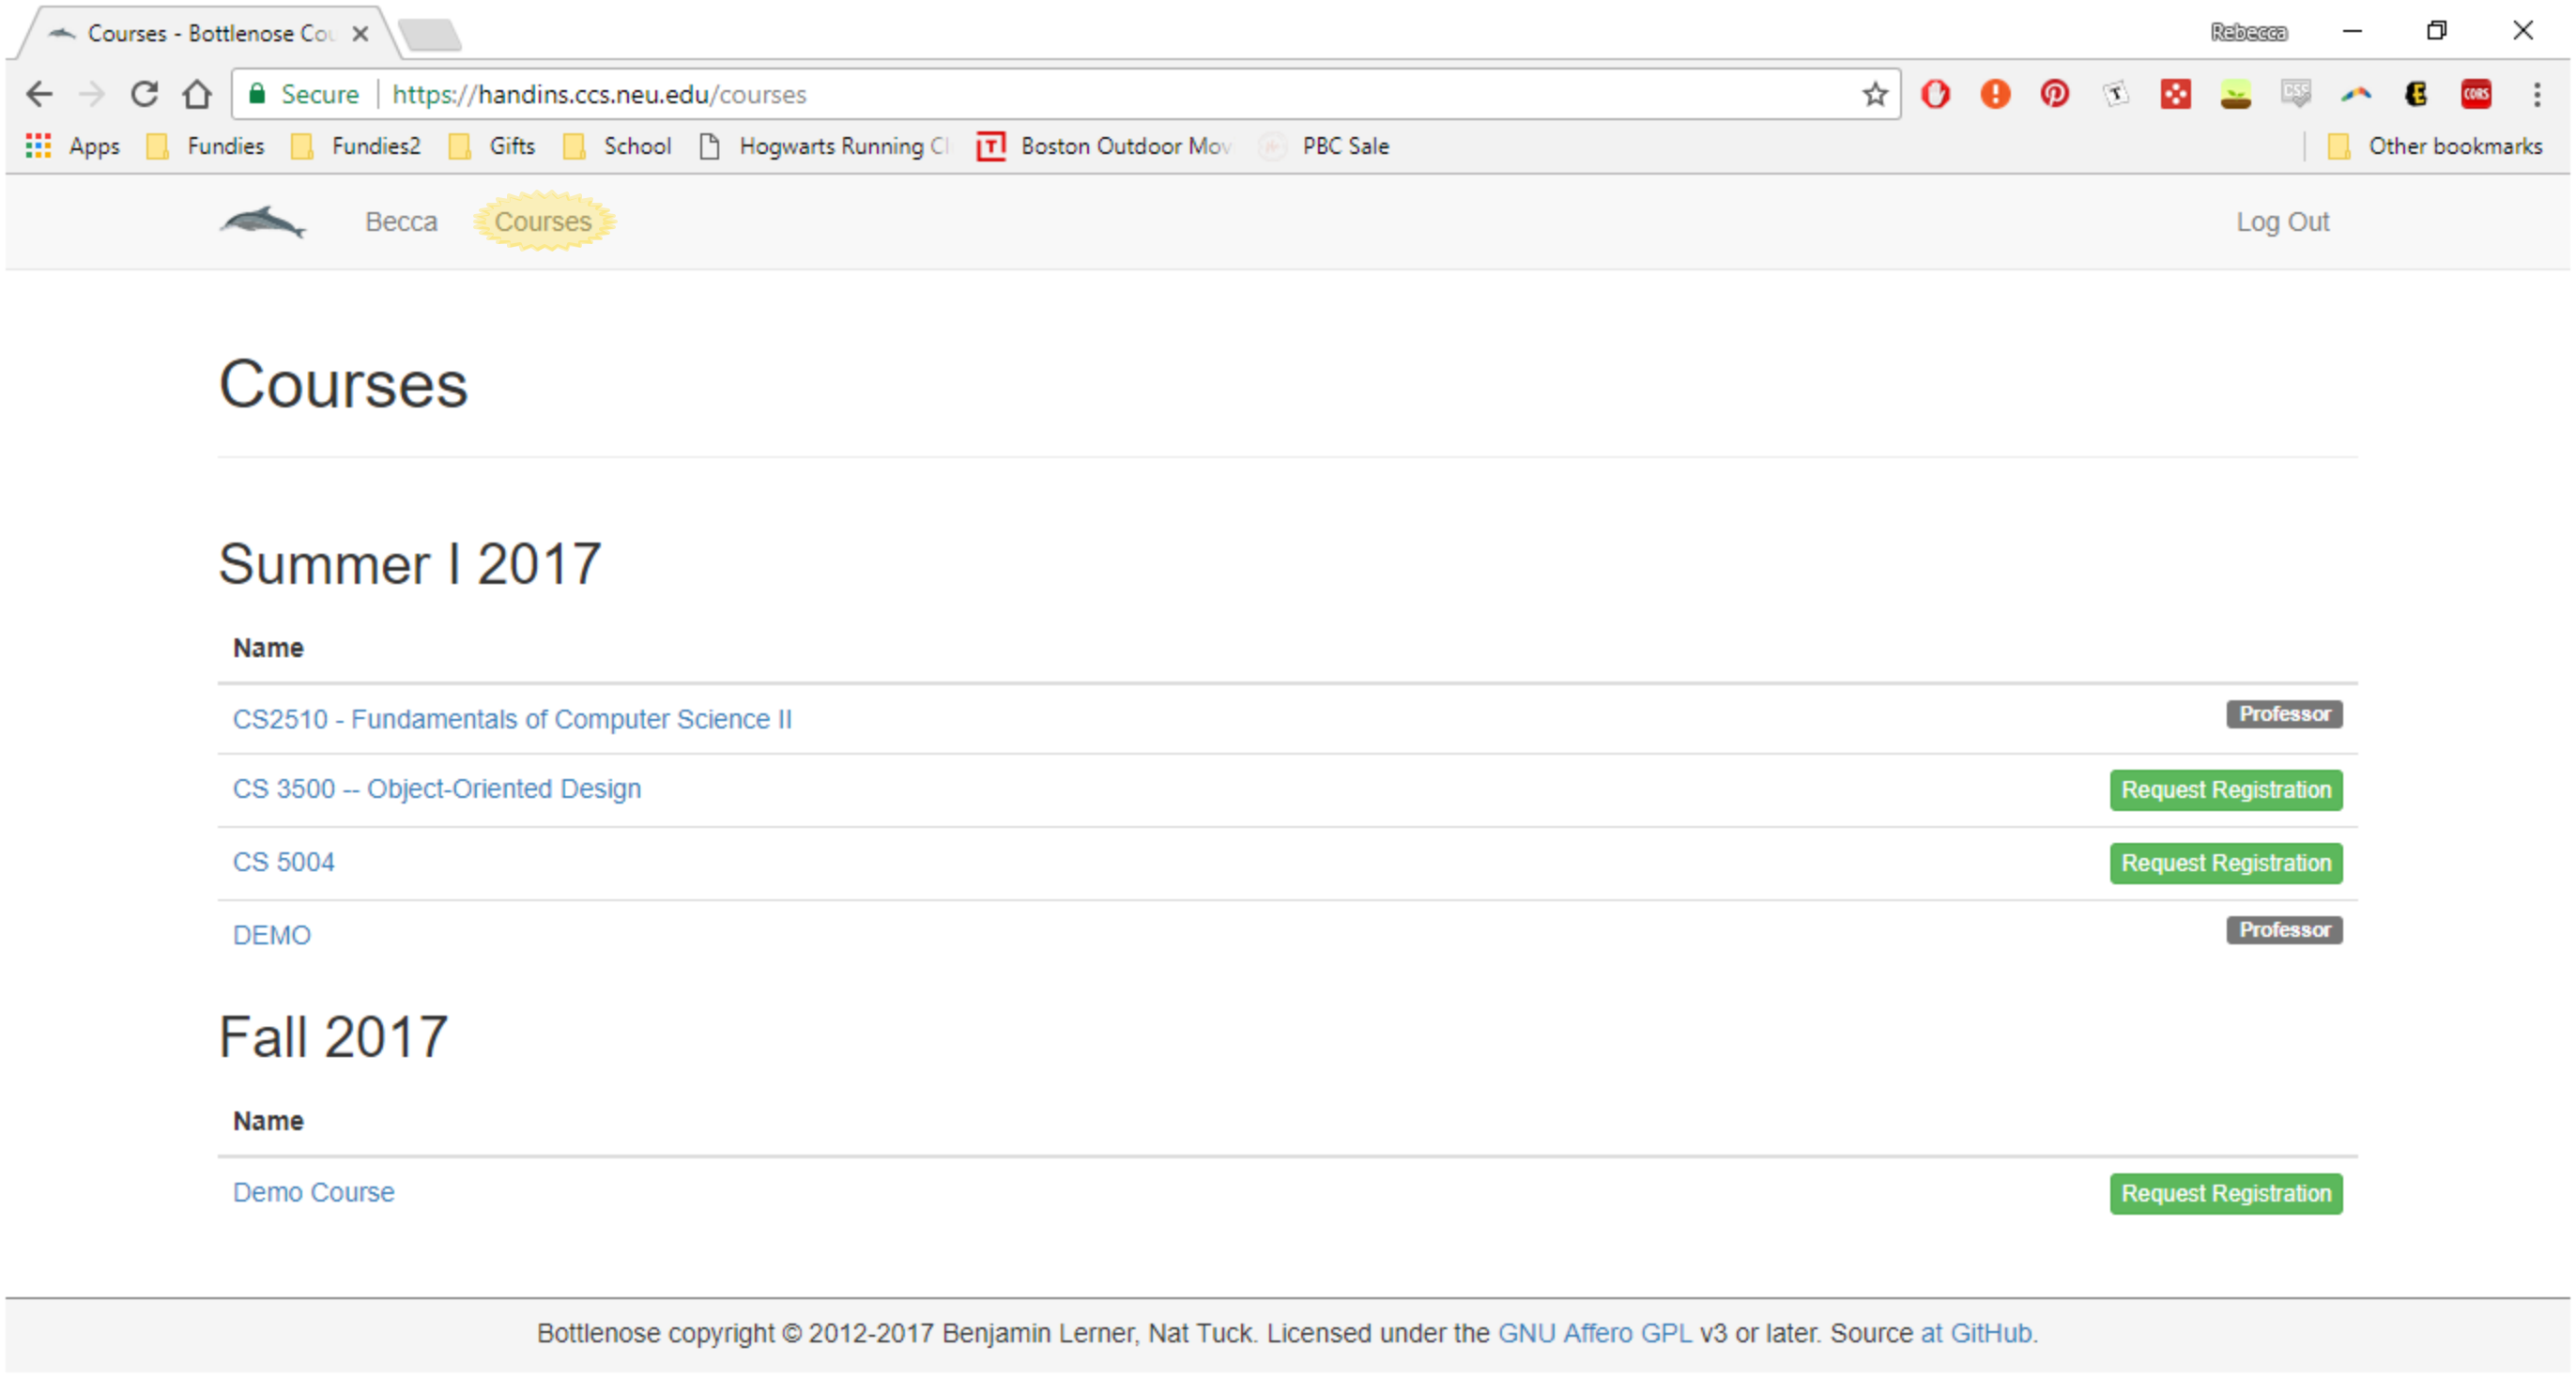
Courses are listed by semester so please ensure you are looking at the right semester since courses often occur for multiple semesters. Next to the course you want to register for (CS2500 in Fall 2017) you should see a
 button. Click this button.
You should see the following page:

For Role select “Grader” if you have been hired as a tutor or “Assistant” if you have been hired as a TA. If you are not sure of your role in the course please contact your professor or course coordinator before continuing.
You may select any lecture section since this does not matter for staff members. The default lecture section is fine.
For Lab sections select the lab section you are in if you know it. Otherwise select any lab section and contact your professor or course coordinator to let them know that they will need to update this later on. Sections are listed by CRN, professor and time (although the professor tends to be the same for all lab sections). When you are done it should look something like the below image. Click the blue
 button at the bottom of the page.
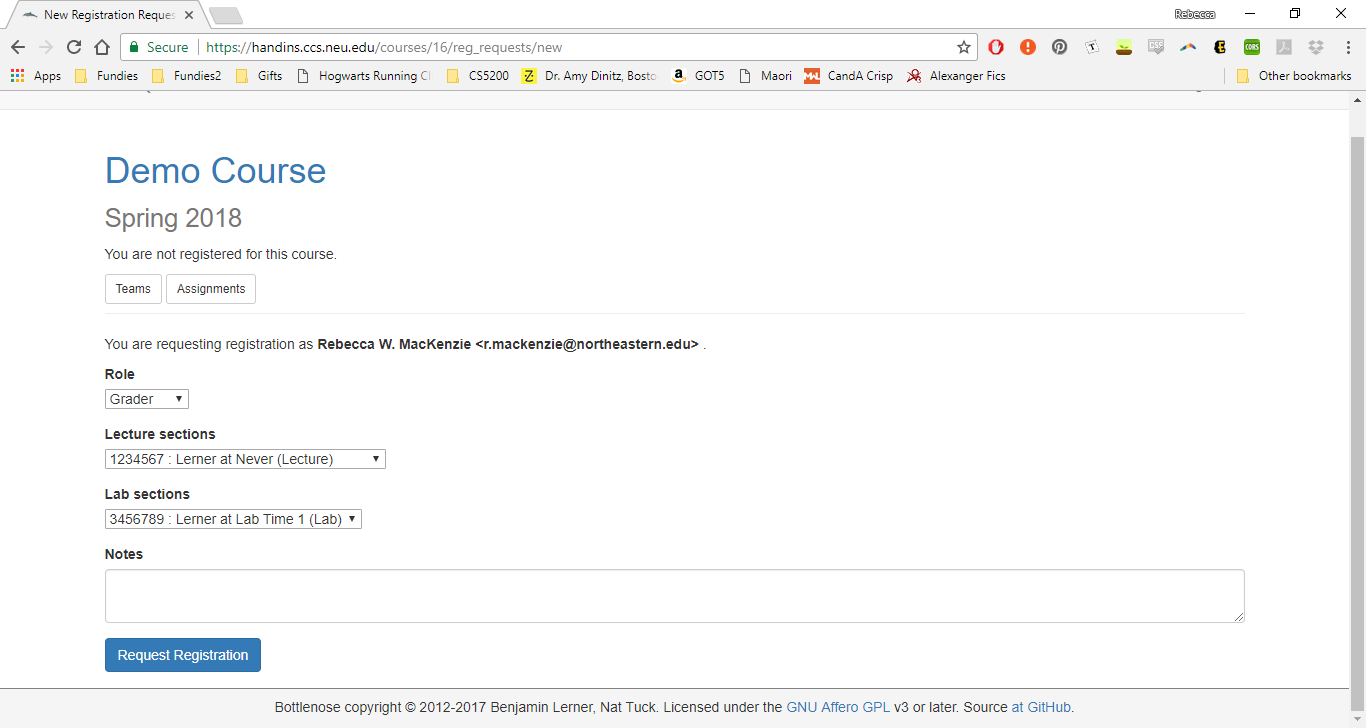
This will bring you back to the Courses page with a message that says “A registration request will be sent.” Next to the course you requested registration for it should say
 .
.
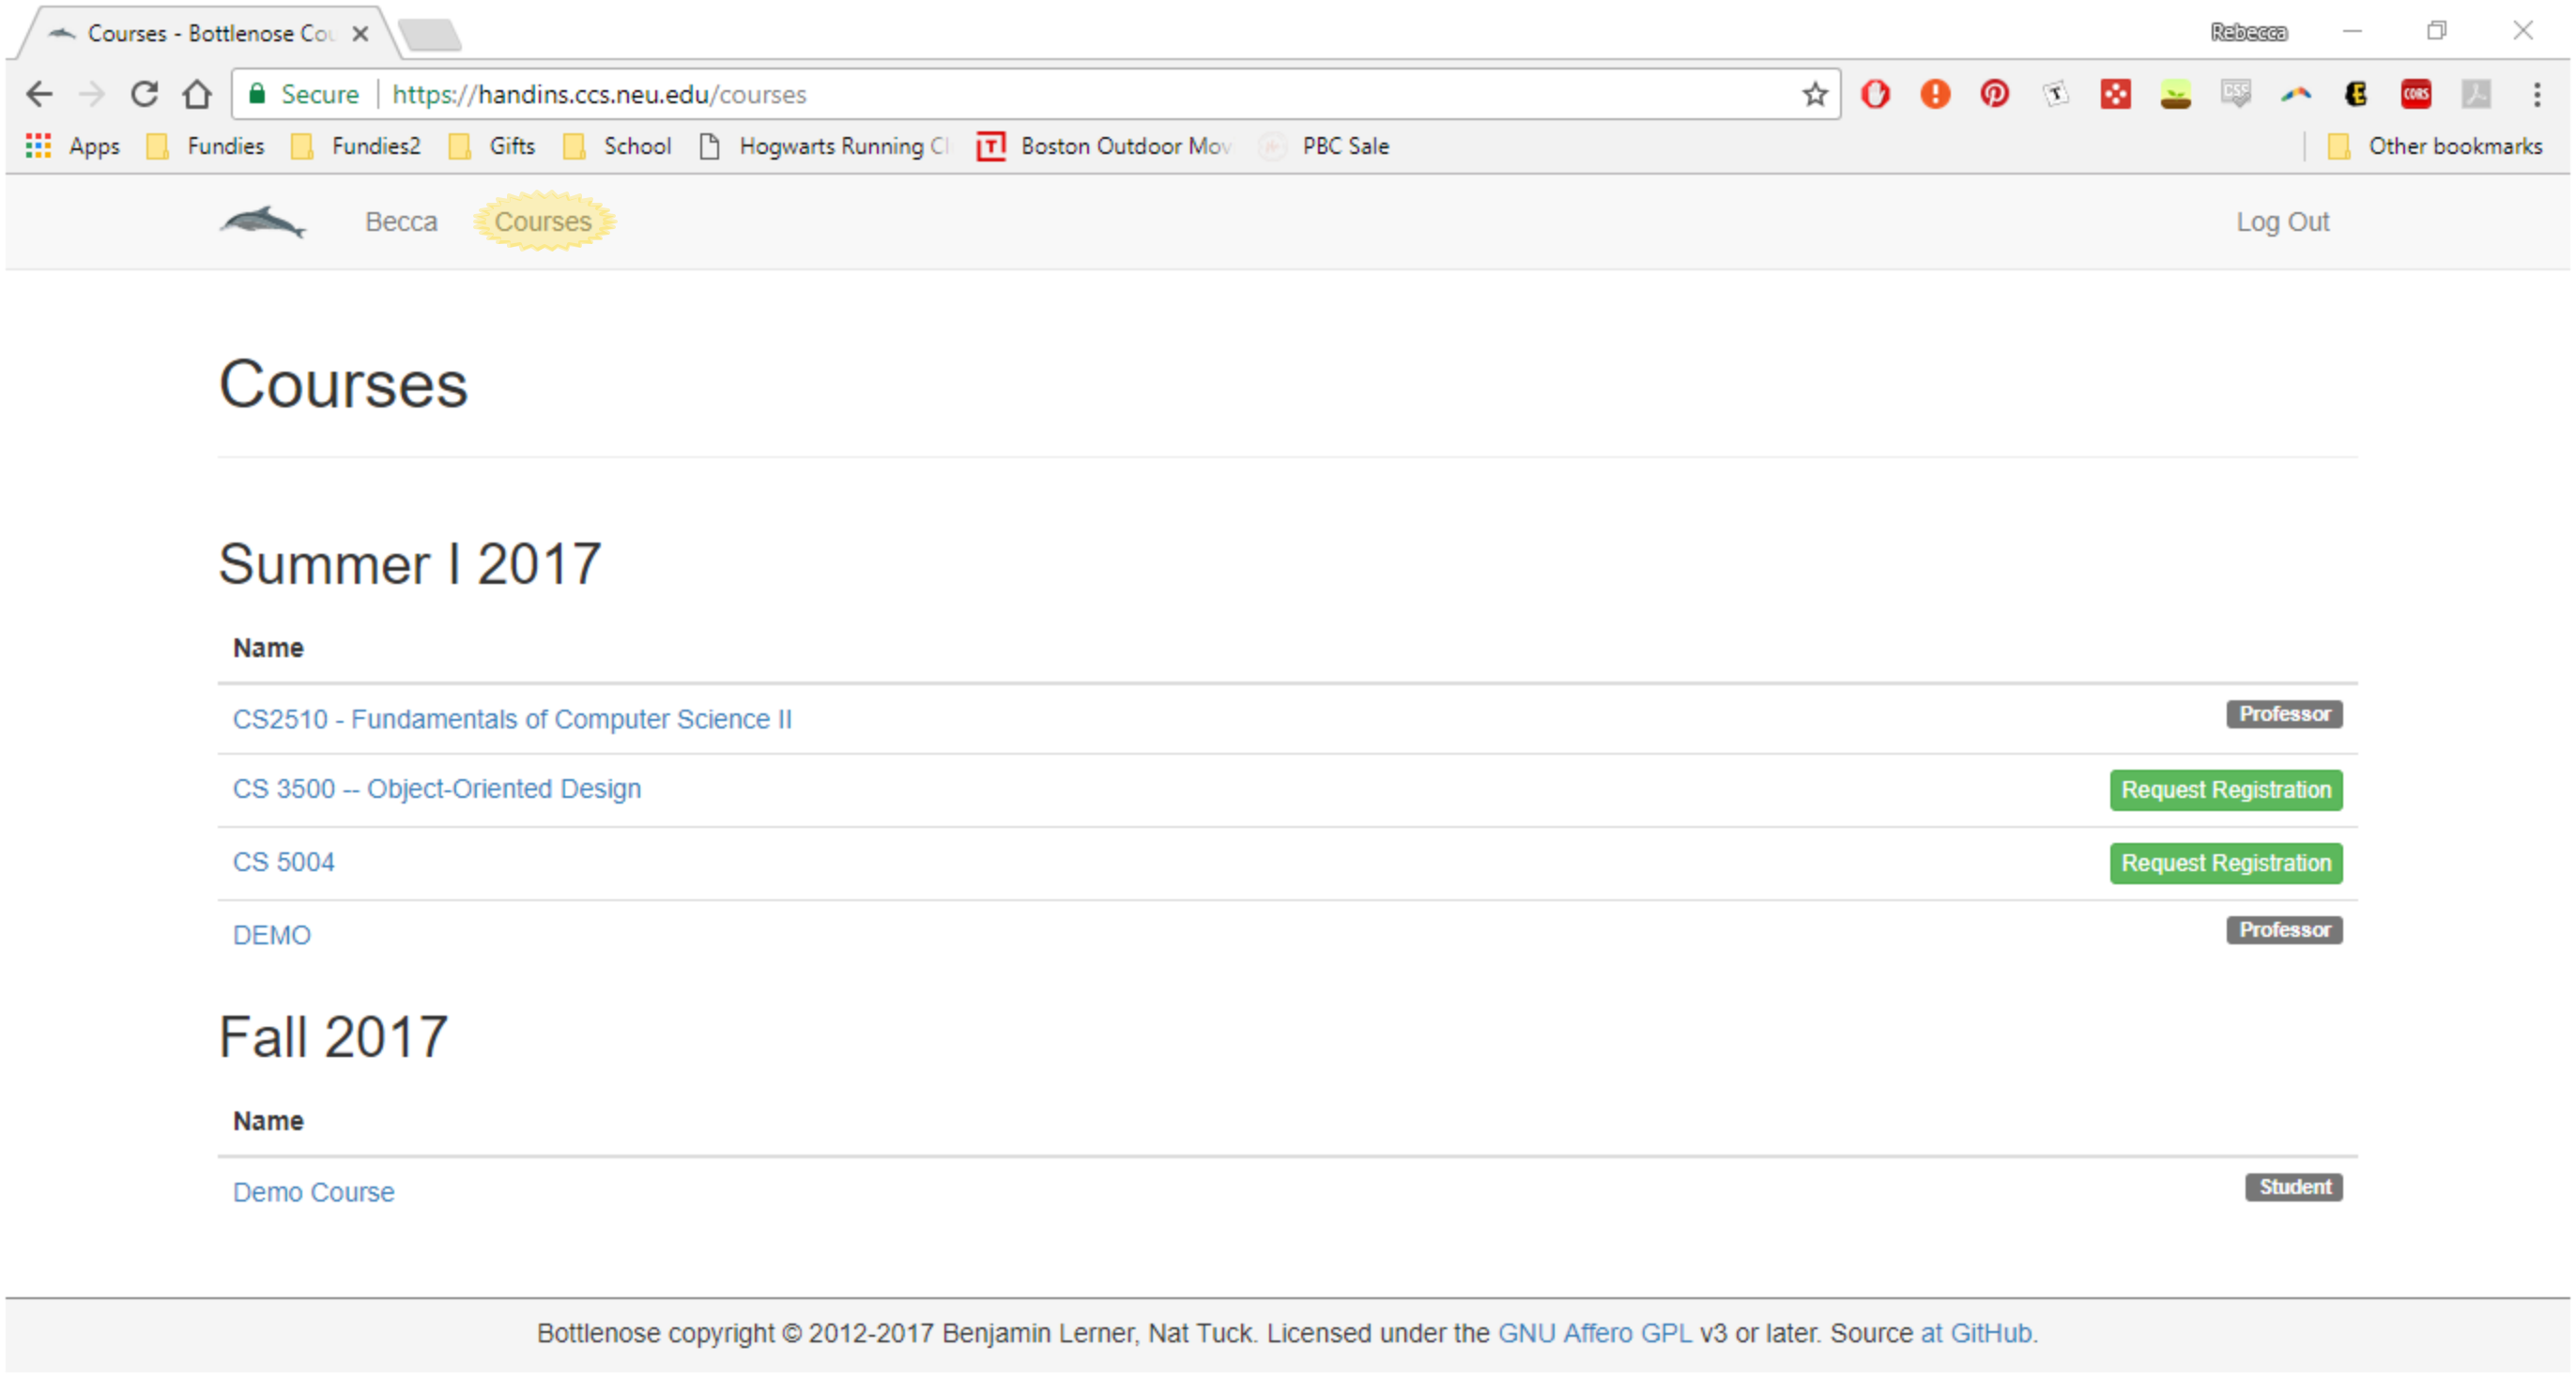
Now you have to wait for the course staff to approve your registration. This should not take more than a day but please be patient with us. Do not post a question on Piazza asking when your registration will be approved. Do not email us asking when your registration will be approved. Once your registration is approved you should see a gray box next to the course that says
 or
or  as shown below.
4 Viewing a course’s home page
Go to the Courses page listed in the toolbar. I have starred the link in the image below which also shows what the Courses page looks like.
Click the blue link for the course you want to view the home page for. You will need to be registered for the course first (i.e. there is a gray box that says either
 or
or  next to the course) so please ensure you have followed the instructions in Registering for a course before proceeding. You should see a page similar to the following:
5 Viewing your assigned grading
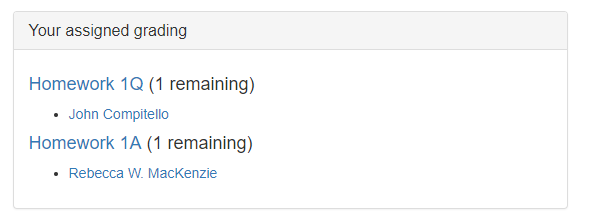
Go to the course home page (see Viewing a course’s home page). On the right hand side you should see a box with all the grading currently assigned to you that you have not yet done.
6 Grading a questionnaire
If you were assigned questionnaires to grade, they will appear in the assigned grading box on the course homepage (see Viewing your assigned grading). Click the link for the student submission you would like to grade. In our case we will grade John’s submission to Homework 1Q.

In order to grade the questionnaire you will need to click the green
 button next to the “Question Grading” section.
You should see a “Response” page as shown below.
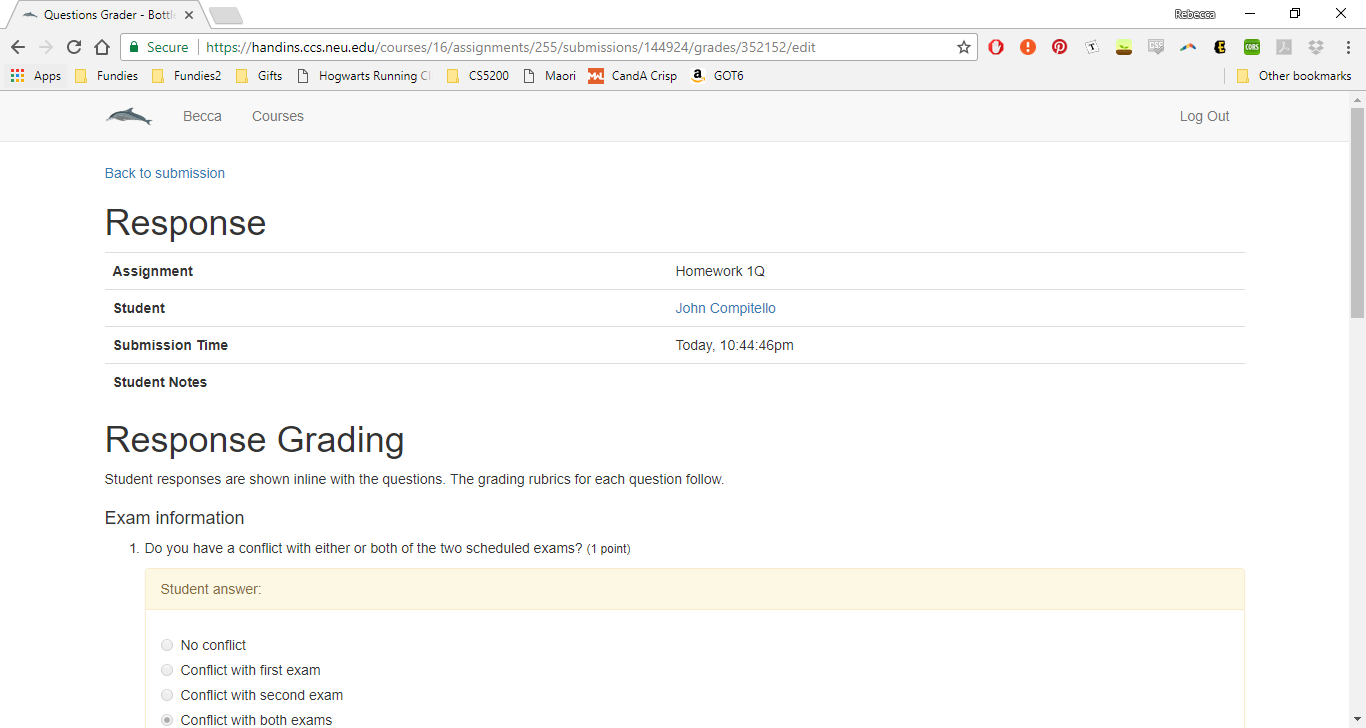
For each question you will see the student answer and then a blue box where you can give the student points based on their answer. A rubric will be provided with some pre-set answers you can select.
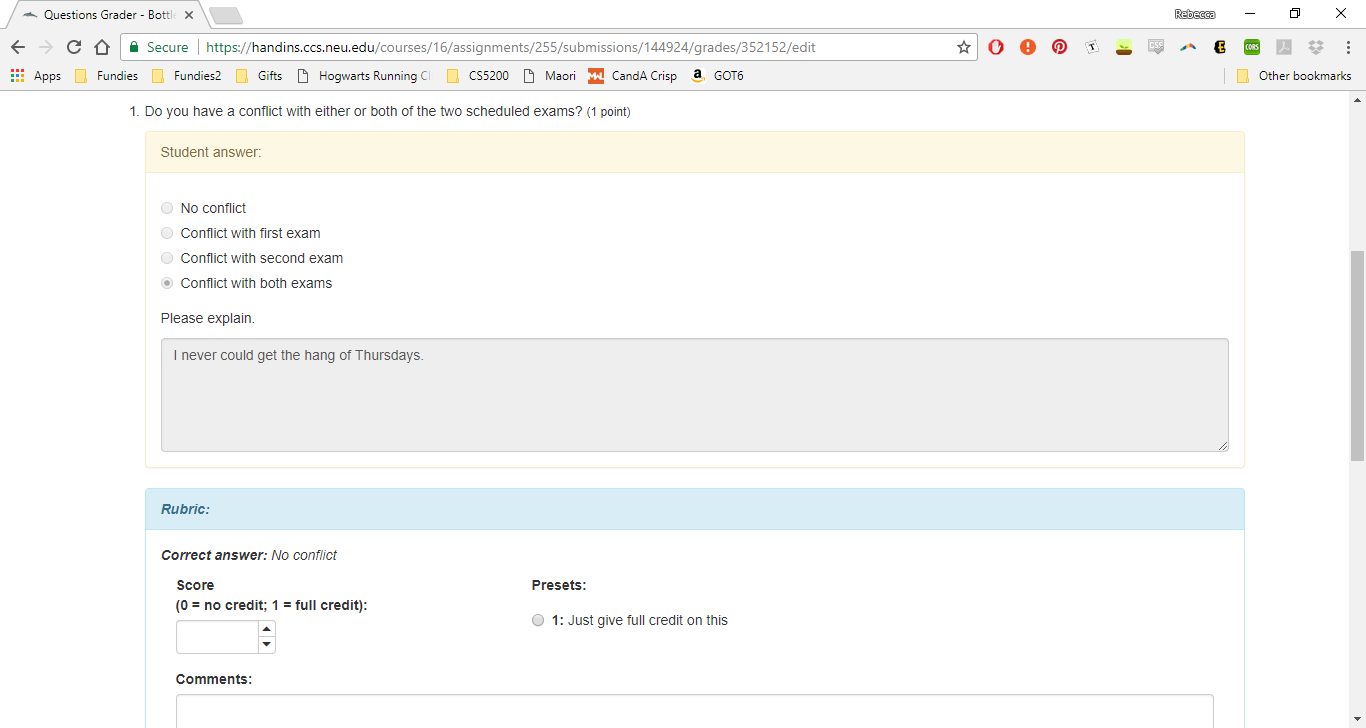
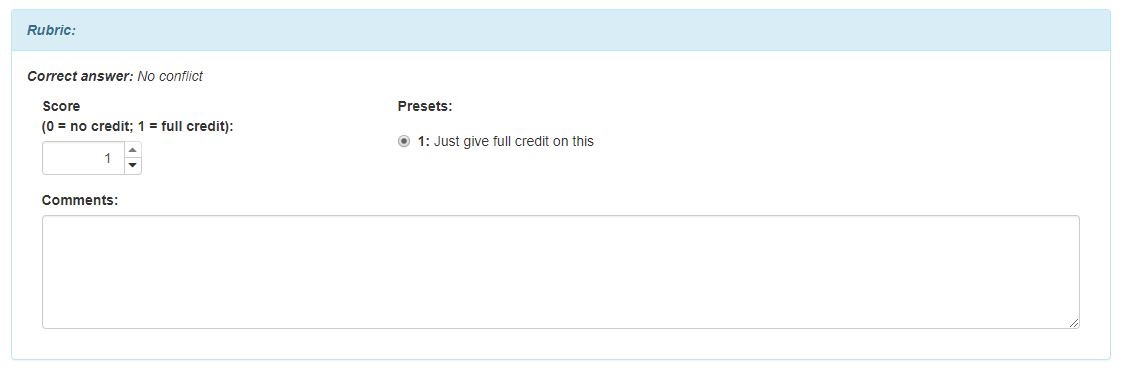
You will need to either select a preset answer or enter a number in the “Score” box. If you give less than full credit please provide some explanation in the “Comments” box. If you select a pre-set amount the “Score” box will automatically fill with that number and some pre-determined comments may also be added if necessary. Please review these comments to ensure they are complete before continuing.
After scoring all the questions click the green
 button at the bottom of the page.
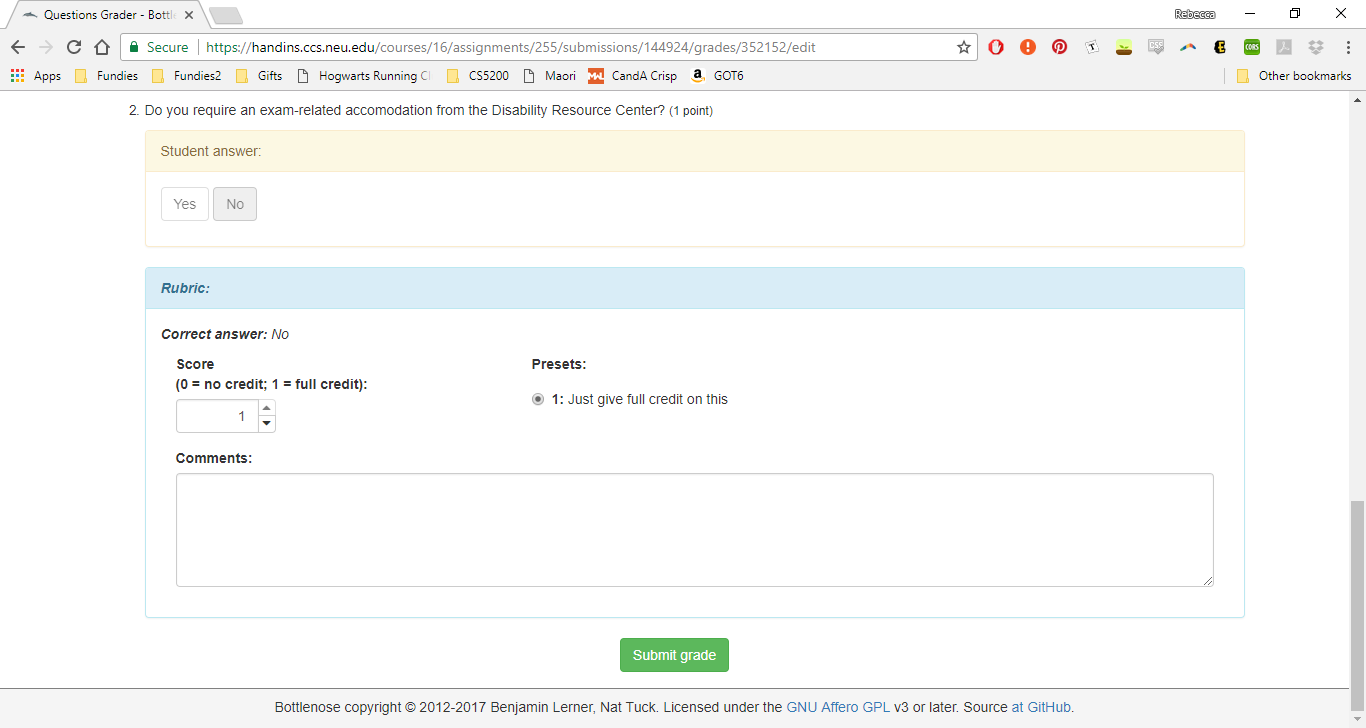
You will be brought back to the home page for this students’ submission. You should be able to see your grade in the “Question Grading” section as well as a blue
 button so you can go back and edit your scores or comments if necessary.
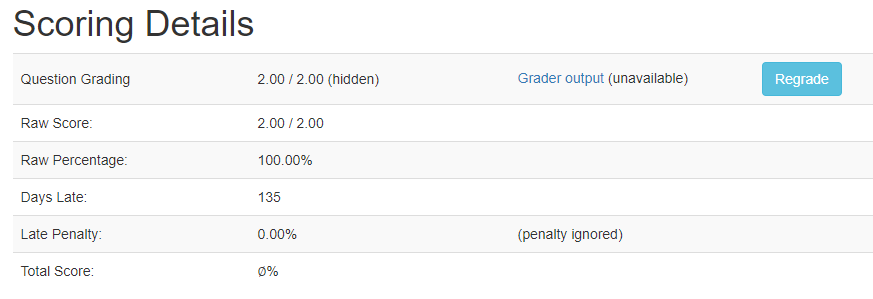
Notice that the question grading says “(hidden)” next to it. This means that the student cannot see this grade because it has not yet been published. The professors and course coordinators publish the grades for an assignment after all the grading has been completed. If you have regraded an old assignment you will need to let them know so they can publish the grades again. Otherwise the students will not be able to see any updates you made to their feedback.
7 Grading an assignment file
If you were assigned files to grade, they will appear in the assigned grading box on the course homepage (see Viewing your assigned grading). Click the link for the submission you would like to grade. In our case we will grade Rebecca’s submission to Homework 1A.

In order to grade the files you will need to click the green
 button in the “Manual Grading” row of the “Scoring Details” section.
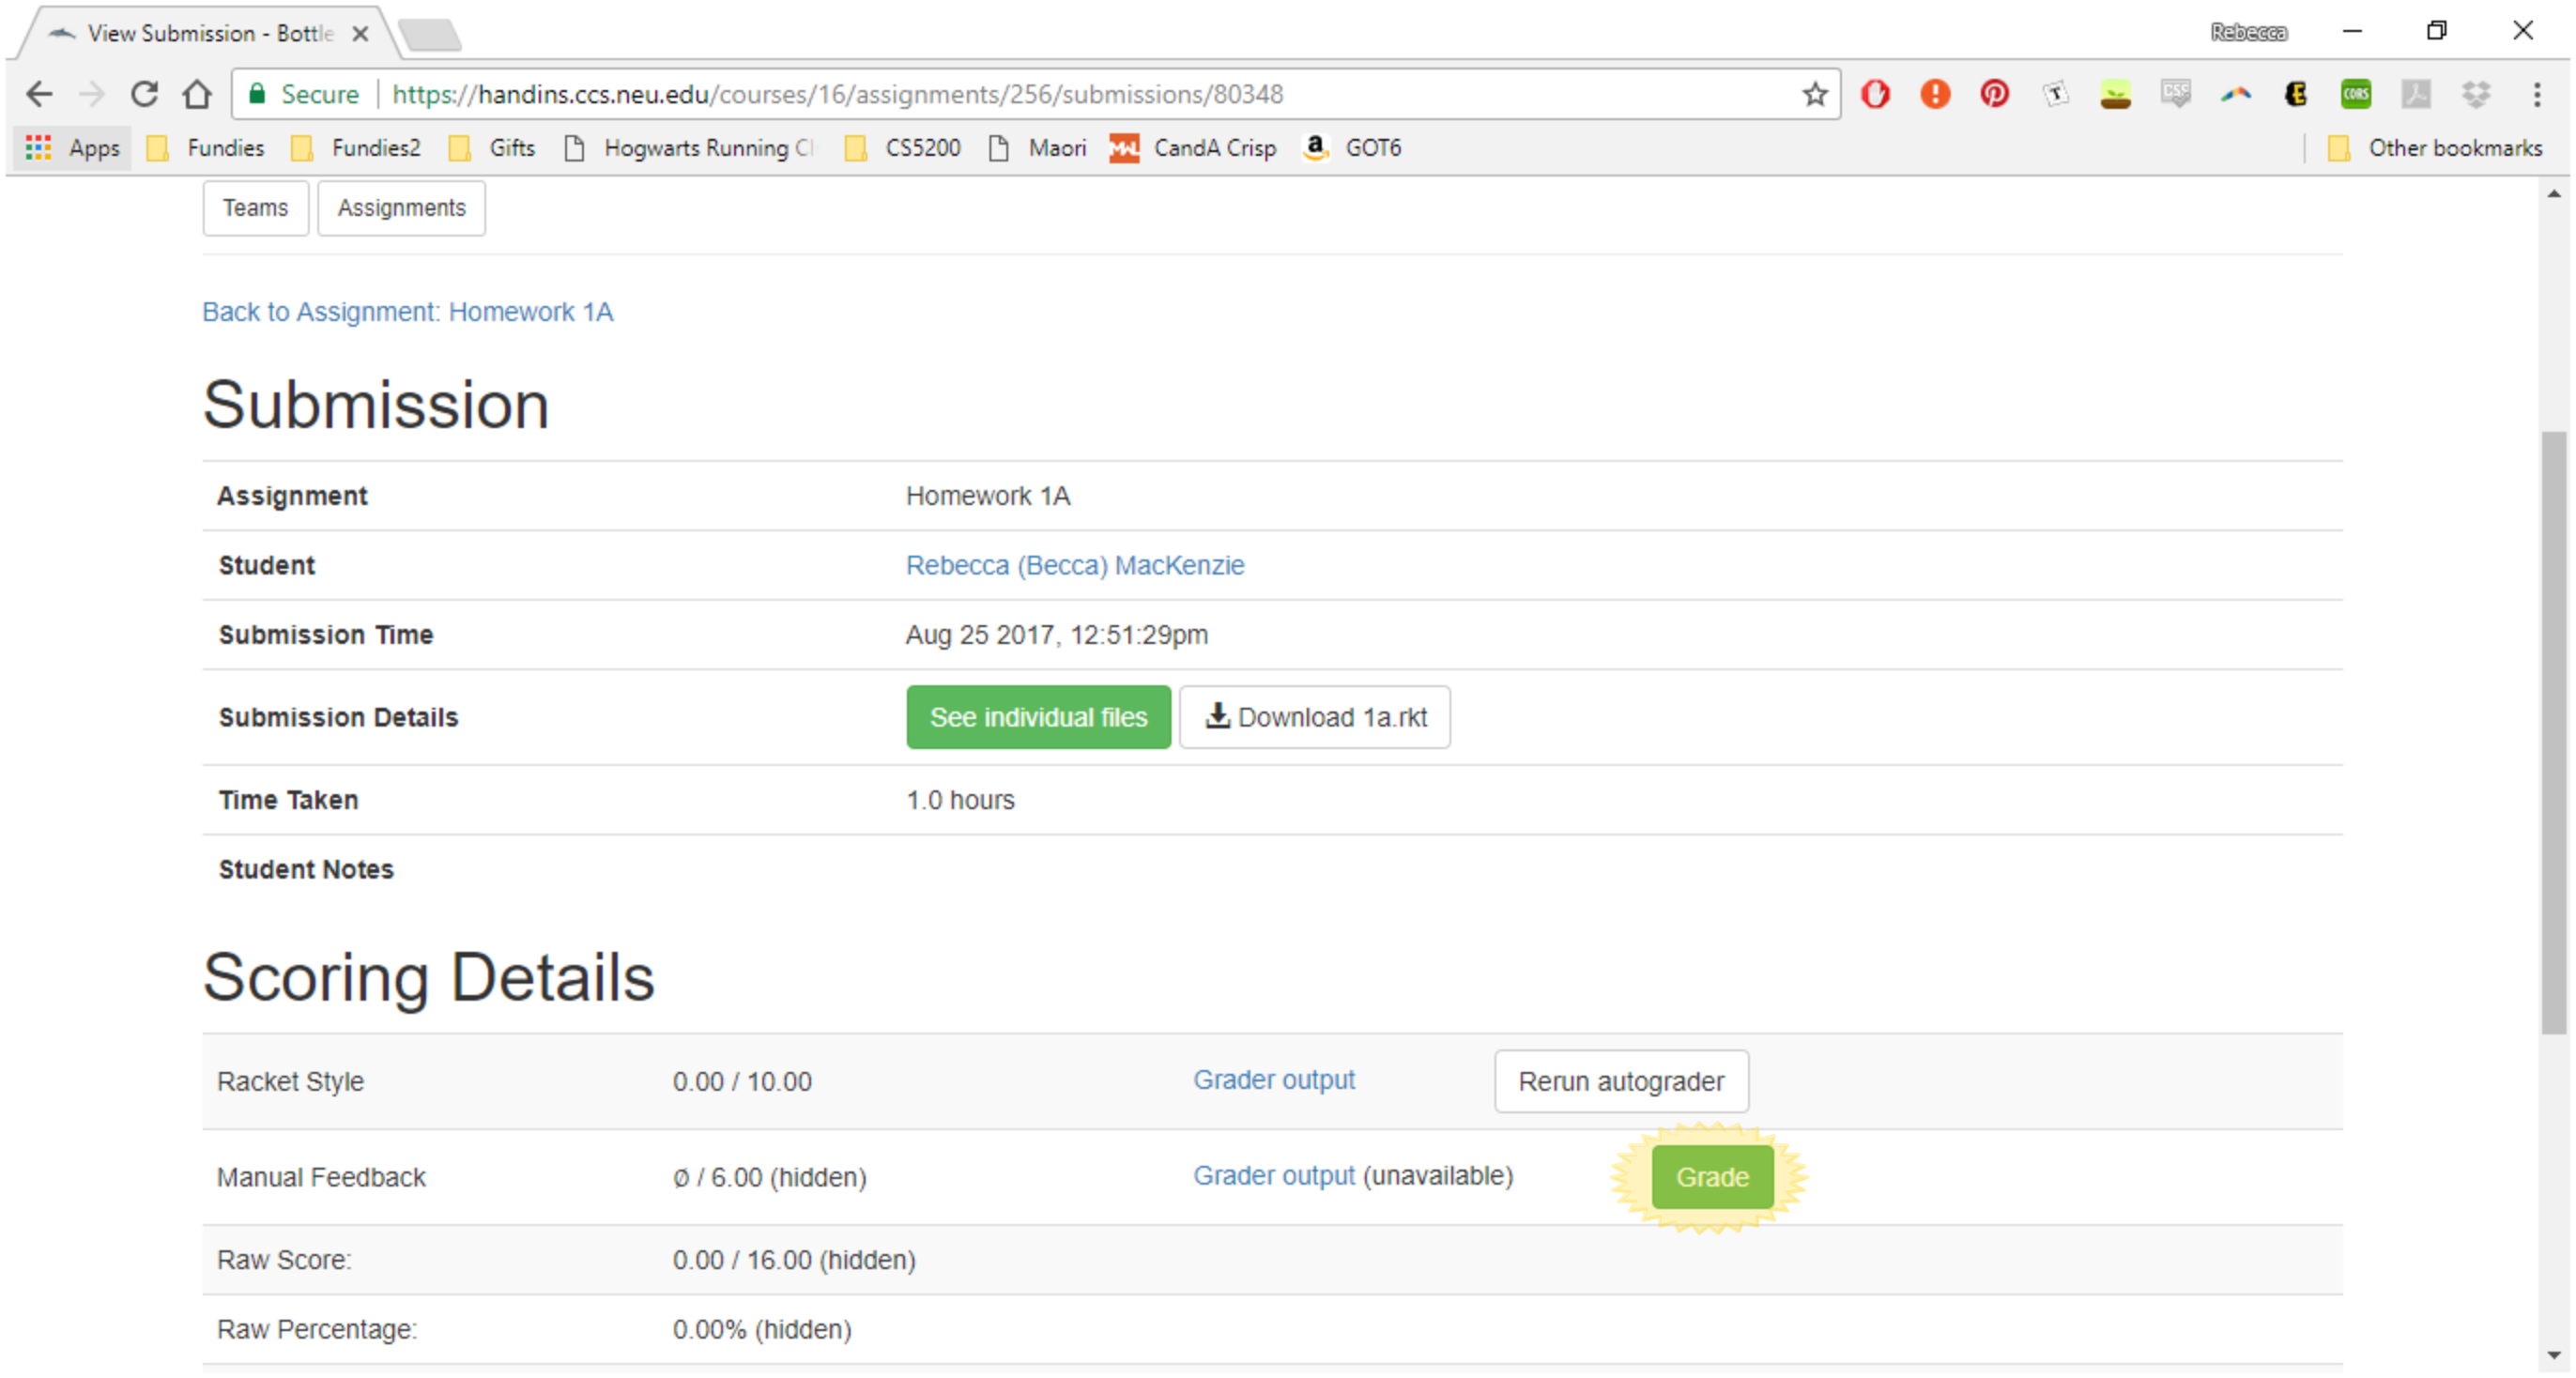
You will be brought to the “Manual Grading” page as shown below.
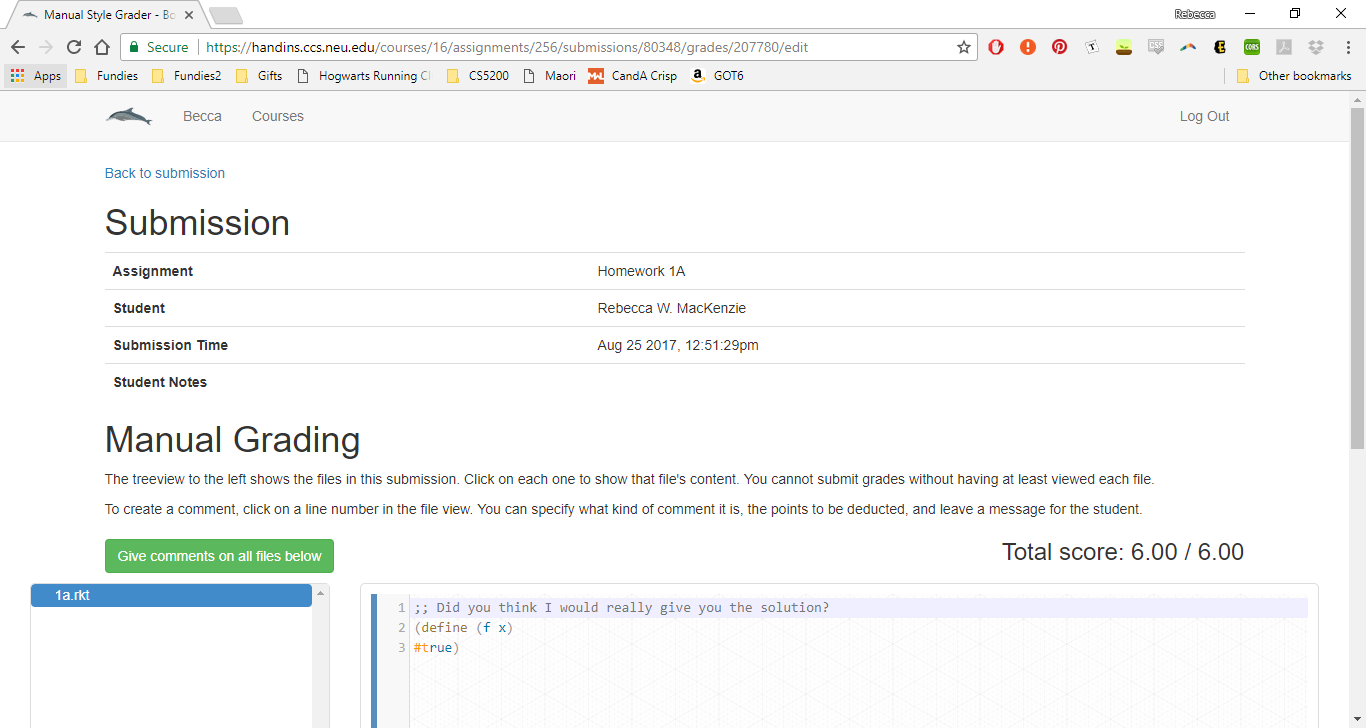
On the left you will see a list of all the files the student submitted to this assignment. In our case, there is only one file (1a.rkt) but sometimes students are required to submit multiple files. If so, you will need to view ALL the files before you can submit your grading.
To leave a comment or deduction on the assignment click the line number where you would like to leave feedback. You must click the actual number rather than the code on that line or else you will not be able to leave a comment. You should see a box like the one shown below.

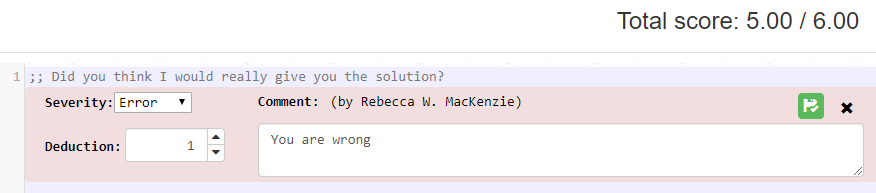
There are four kinds of comments: an error (shown above), a warning (the yellow box shown below), an info comment (the blue box shown below), and a bonus comment (green). This is mostly to notify the student of the severity of the comment. The only difference is that bonus comments are the only way to give points back to the student: this is also how extra-credit grading works.


In the “Deduction” box you should put the number of points you want to remove from the student’s score and in the text box you should write an explanation of why that is. You can also leave 0 point deductions to leave feedback without removing points. When you make these deductions it should change the student’s grade in the top right corner as shown below.
Click the black “x” in the top right corner of the comment box to delete a comment.
Next to the “x” icon will appear a save-status icon, in one of three colors (all three are shown here, but only one will actually appear):
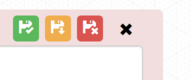
Green-check means the comment has been auto-saved correctly. Yellow-arrow means there are pending changes that haven’t been saved: they will automatically save as soon as this comment loses input focus. Red-X means there was an error saving the comment – most likely, that the deduction isn’t a valid number. Hover the mouse over the icon to see a tooltip explaining what the error was.
When you are done leaving feedback for the student click the green
 button in the top left.
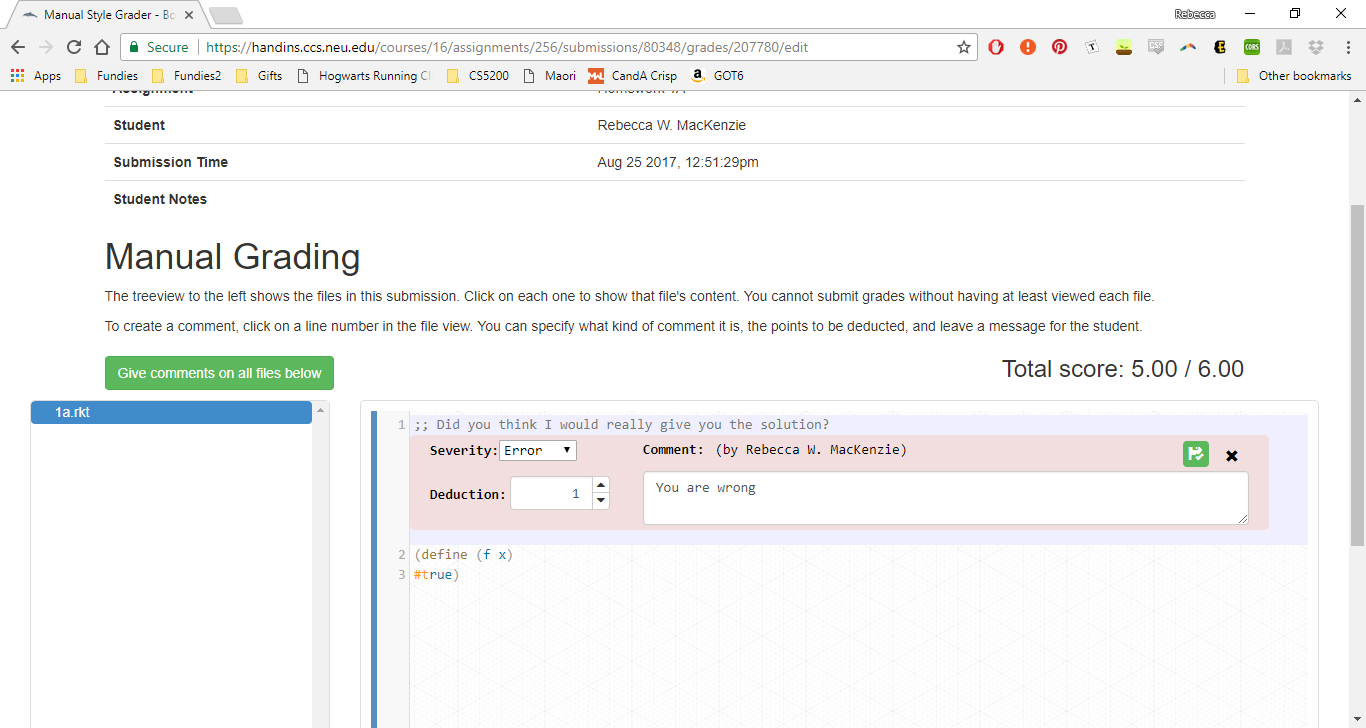
You will be brought back to the home page for this students’ submission. You should be able to see your grade in the “Manual Feedback” section as well as a blue
 button so you can go back and edit your scores or comments if necessary.
Notice that the question grading says “(hidden)” next to it. This means that the student cannot see this grade because it has not yet been published. The professors and course coordinators publish the grades for an assignment after all the grading has been completed. If you have regraded an old assignment you will need to let them know so they can publish the grades again. Otherwise the students will not be able to see any updates you made to their feedback.
8 Entering teams for an assignment
Go to the course home page (see Viewing a course’s home page) and click the “Teams” button at the top of the page.
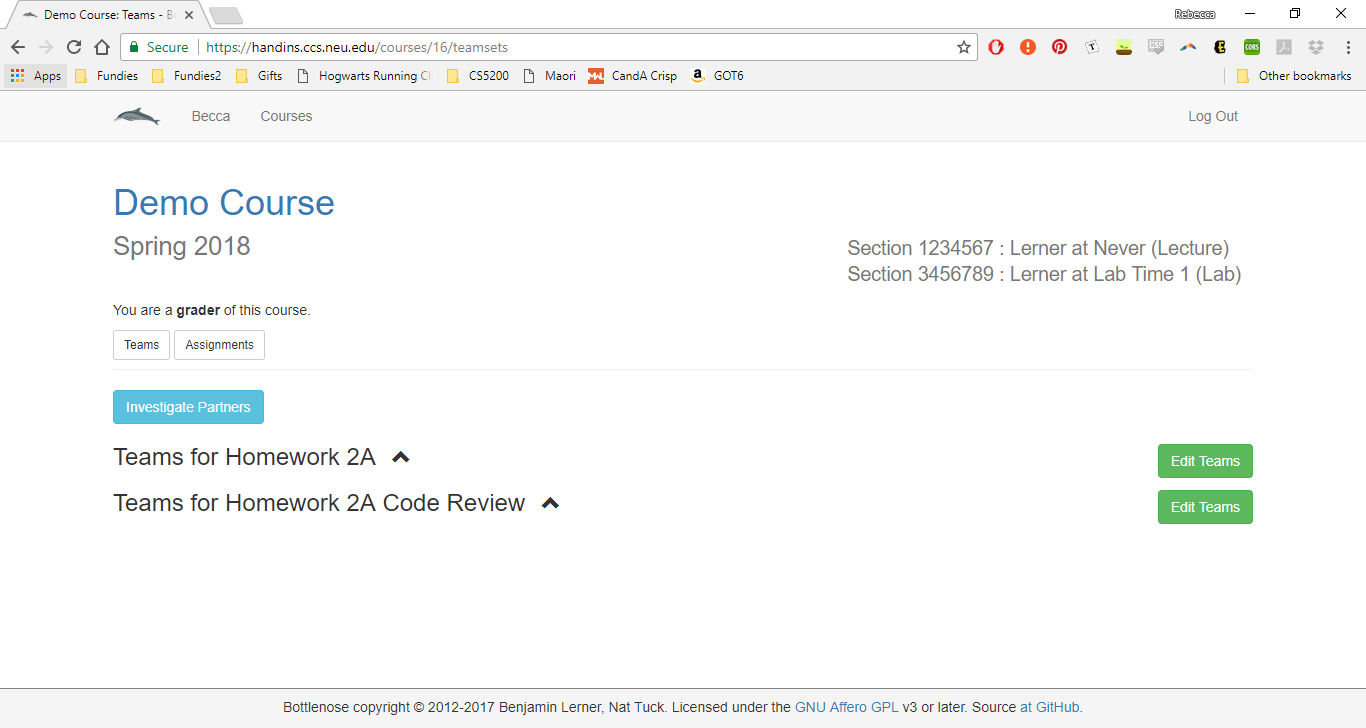
Next to the assignment you want to edit teams for click the green
 button. WARNING: If you edit the teams for an assignment it will affect all future assignments unless a professor or course coordinator has specifically separated those assignments. In our case let’s try editing the teams for homework 2A.
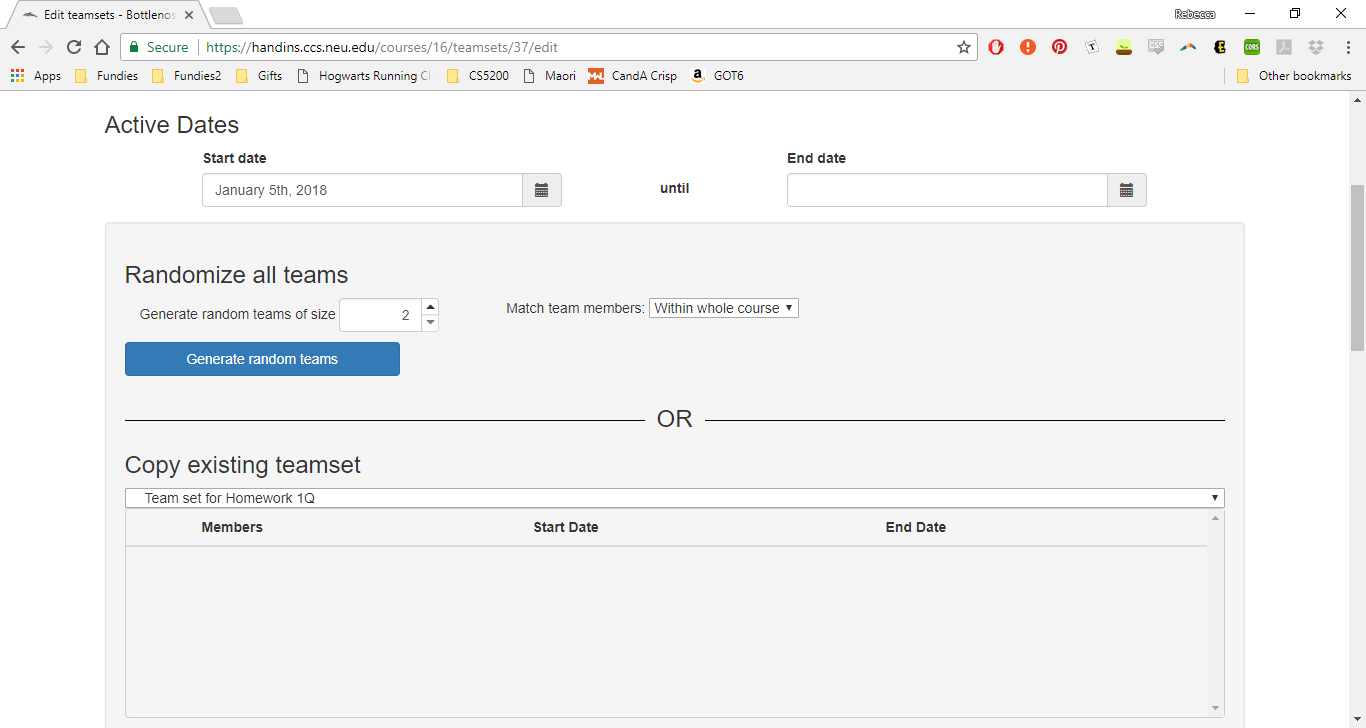
There are three ways to add teams: you can team up specific students with each other, you can accept requests from students who want to team up, or you can create random teams of a certain size.
8.1 Entering teams of specific students
Scroll down until you see the “Active Teams” and “Students Without Teams” sections as shown below.

For each student you want to add to the team click the green
 button next to that student’s name. The names should appear in the “Select team members” box as shown below.
If you make a mistake you can select the student’s name and click the “Remove Selected” button. Make sure the student’s name is highlighted in blue before you click the button.

When you have selected all the correct students click the blue
 button. You should see the team appear in the “Active Teams” section as shown below.
If there are too many students to comfortably view, you can filter the teams and students shown by section, using the dropdown menu just above the “Active Teams”. The students without teams list will be filtered to show only students from the given section, and the active teams list will be filtered to show any teams with at least one student in the given section. Additionally, if any teams have students that span multiple sections of the given type (i.e., in multiple lab sections when filtering by a lab section, or multiple lecture sections when filtering by a lecture section), a warning icon will be shown. Hover over the icon to see which sections are involved.
8.2 Entering teams of specific students in bulk
If you have a lot of specific student teams to enter you can enter them all at once to save time. Scroll to the “Enter bulk team members” section as shown below.
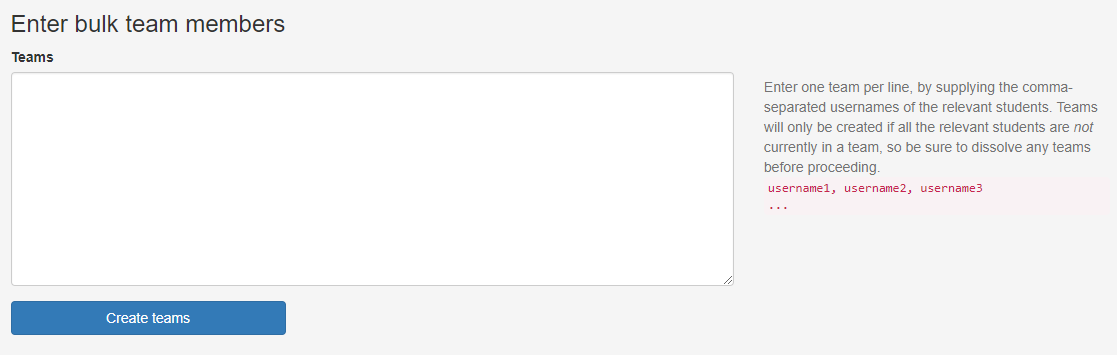
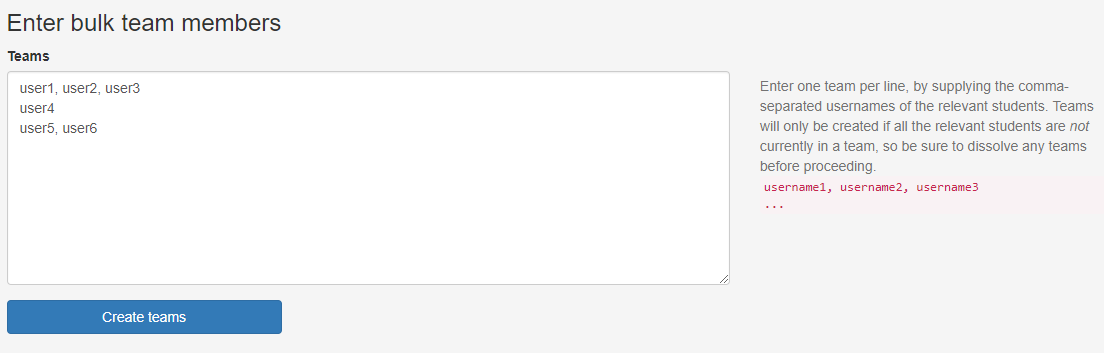
You will need to enter one team per line. Teams are entered using the students’ CCIS usernames. If the CCIS username is entered incorrectly then the team will not be created so make sure you get it right! Shown below is an example of entering three teams. Team 1 consists of user1, user2, and user3. Team 2 consists of just user4. Team 3 consists of user5 and user6.
8.3 Entering random teams
If you want to create random teams at any time (including AFTER you have created specific teams using the methods above), scroll to the section labeled “Randomize all teams” at the top of the page.
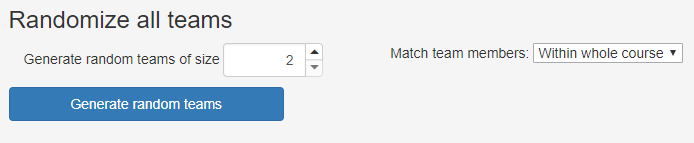
You can choose the size of the teams to randomize using the first textbox. You must choose an integer number greater than 1. In the dropdown you can choose who will be in these teams. If you choose “Within the whole course” any student who is not already assigned to a team for this assignment will be given a team of students in the course. If you choose “Within lectures” students will only be allowed to partner with people in the same lecture section as them and if you choose “Within labs” students will only be allowed to partner with people in the same lab as them.
8.4 Approving team requests
If there are any team requests which have not yet been accepted, they will appear in the “Existing team requests” section as shown below.

To accept a request you can click the
 button. To accept all requests you can click the
  button. To deny a request you can click the
  button. To deny all requests you can click the
  button. Once a request has been accepted you will see a successful message like the one shown below.
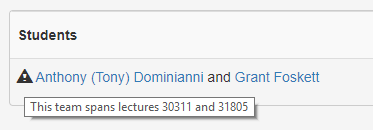
If you select a section from the dropdown it will show only team requests involving students in the given section. If a team request spans multiple sections you will see a warning symbol on the left-hand side that indicates this fact, as shown in the team request below.

Note that a warning will be shown if the team spans multiple sections of the currently selected type. That is, if you’re filtering by a lecture section, it will warn about teams with members in different lecture sections; if you’re filtering by a lab section, it will warn about teams spanning different labs. When viewing all team requests, no warnings will be shown. Hovering over the warning icon will show a message indicating which sections the given students are in:
To accept all requests from the given section click the green “Accept all in section” button. Note that this will accept all teams with any member in the current section. If you want to prevent such cross-section requests, individually delete them before accepting them all.
8.5 Troubleshooting team creation
If you do not see the team or teams you created appear in the “Active teams” section, scroll to the top of the page and check the start and end date. If both dates are the same then the team will not be created. You will need to manually delete the end date (do not add in another end date, just leave that field blank) in order to create the team. Shown below is an example where the dates are preventing team creation.
